Accurizing the At The Front M43 Pile Liner
Review Date: 2/14/2008
Author: Sean Foster
Background:
After the review of the ATF M43 Pile liner – there were several deficient areas that needed to be corrected prior to use or display. This article describes the changes that were made at a very high level. This is not a series of detailed instructions, but rather a short description of what changes were made and the observations made while making those changes.
This is not a do-it-yourself project for the sewing novice, it is recommended that this is performed by an experienced seamstress or tailor.
Notes:
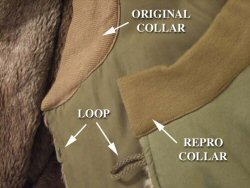
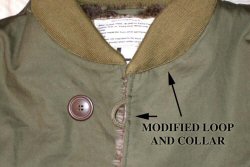
The collar was easy enough to fix - remove it from the ends of the collar (it can stay stitched at the back from the shoulder seam) and re-sew in the proper profile.
Before:
After:
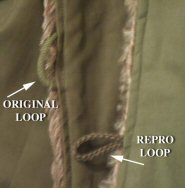
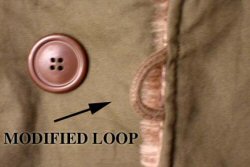
While the front edges of the collar were open, the button loops were amended. This was the complicated part. The old loops are sewn in very well, and are not easy to remove with a seam ripper. On my liner, we cut out the last half inch of the edge with the button loops. I found a similar OD cord to re-make the button loops - the ones on the repro were going to be damaged too much by the time I worked them free. The jacket had to be halfway turned inside-out to sew in the new loops - and I recommend this only be done by an experienced seamstress/tailor.
Before:
After:
In the end, it was worth the effort for me but I believe most people will be content to change only the collar, and leave the button loops alone. Changing the button loops did require the jacket to become slightly smaller in the chest dimension, so if you plan on doing this be sure to account for the change in size when you order. I ordered a Large, and I am a 42-43 chest. After losing a few inches in the garment due to the conversion, it fits perfectly (it was a little large for me before the conversion).
Overall, the conversion of the liner went well, but changing the loops was more complicated than expected.
90th IDPG Reviews


