Dying Helmet Liner Chinstraps
Date Written: 2/2/2008
Author: Chris Guska
Introduction:
I purchased several leather liner chinstraps from At The Front while at the Fort Indiantown GAP event to replace the worn originals that I’ve been using for years. The price on the reproductions was right, but the look just didn’t fit. The chinstraps are a light “neutral” brown color. They are significantly lighter than 60 year old worn originals – well, you might be smacking yourself on the forehead and saying “they were originally lighter when they came from the factory” – I agree. I just think its really silly to wear a beat up, scuffed, dented helmet, tattered 41 jacket, dirty pants, and mud coated boots - and have an utterly pristine new liner chinstrap that will look new for the next 40 years.
Many people simply say – use some neatsfoot oil or “insert your favorite oil here” and it’ll darken up nicely. Well – I tried that, and it didn’t work. The liner chinstraps seem to have some kind of finish or coating on them.
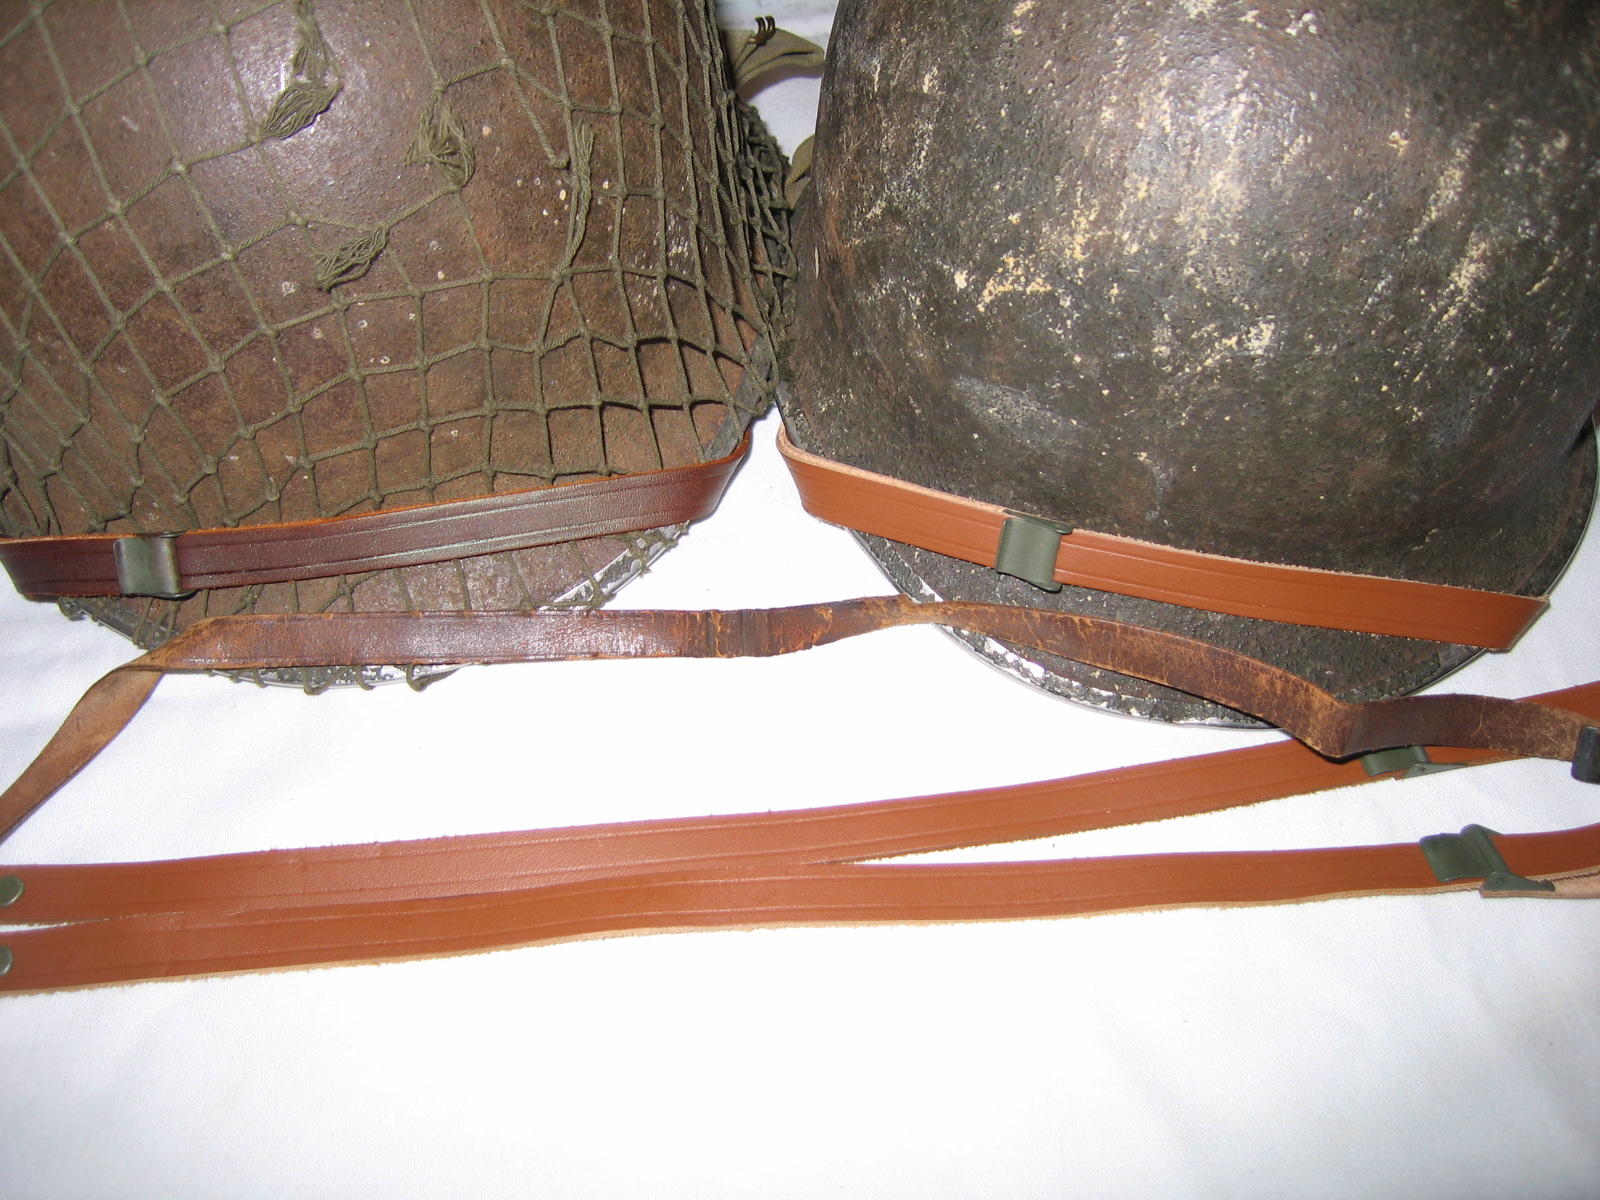
Ok, so the first one in the photo is the one treated with neatsfoot oil. It is very very slightly darker than the untreated repro in the center. On the bottom is the used original I intend to replace.
Without further ado – here’s what I ended up doing to get the desired result.
Supplies:
Old rags
Rubber gloves (laytex, nitrile, vinyl, whatever your flavor is)
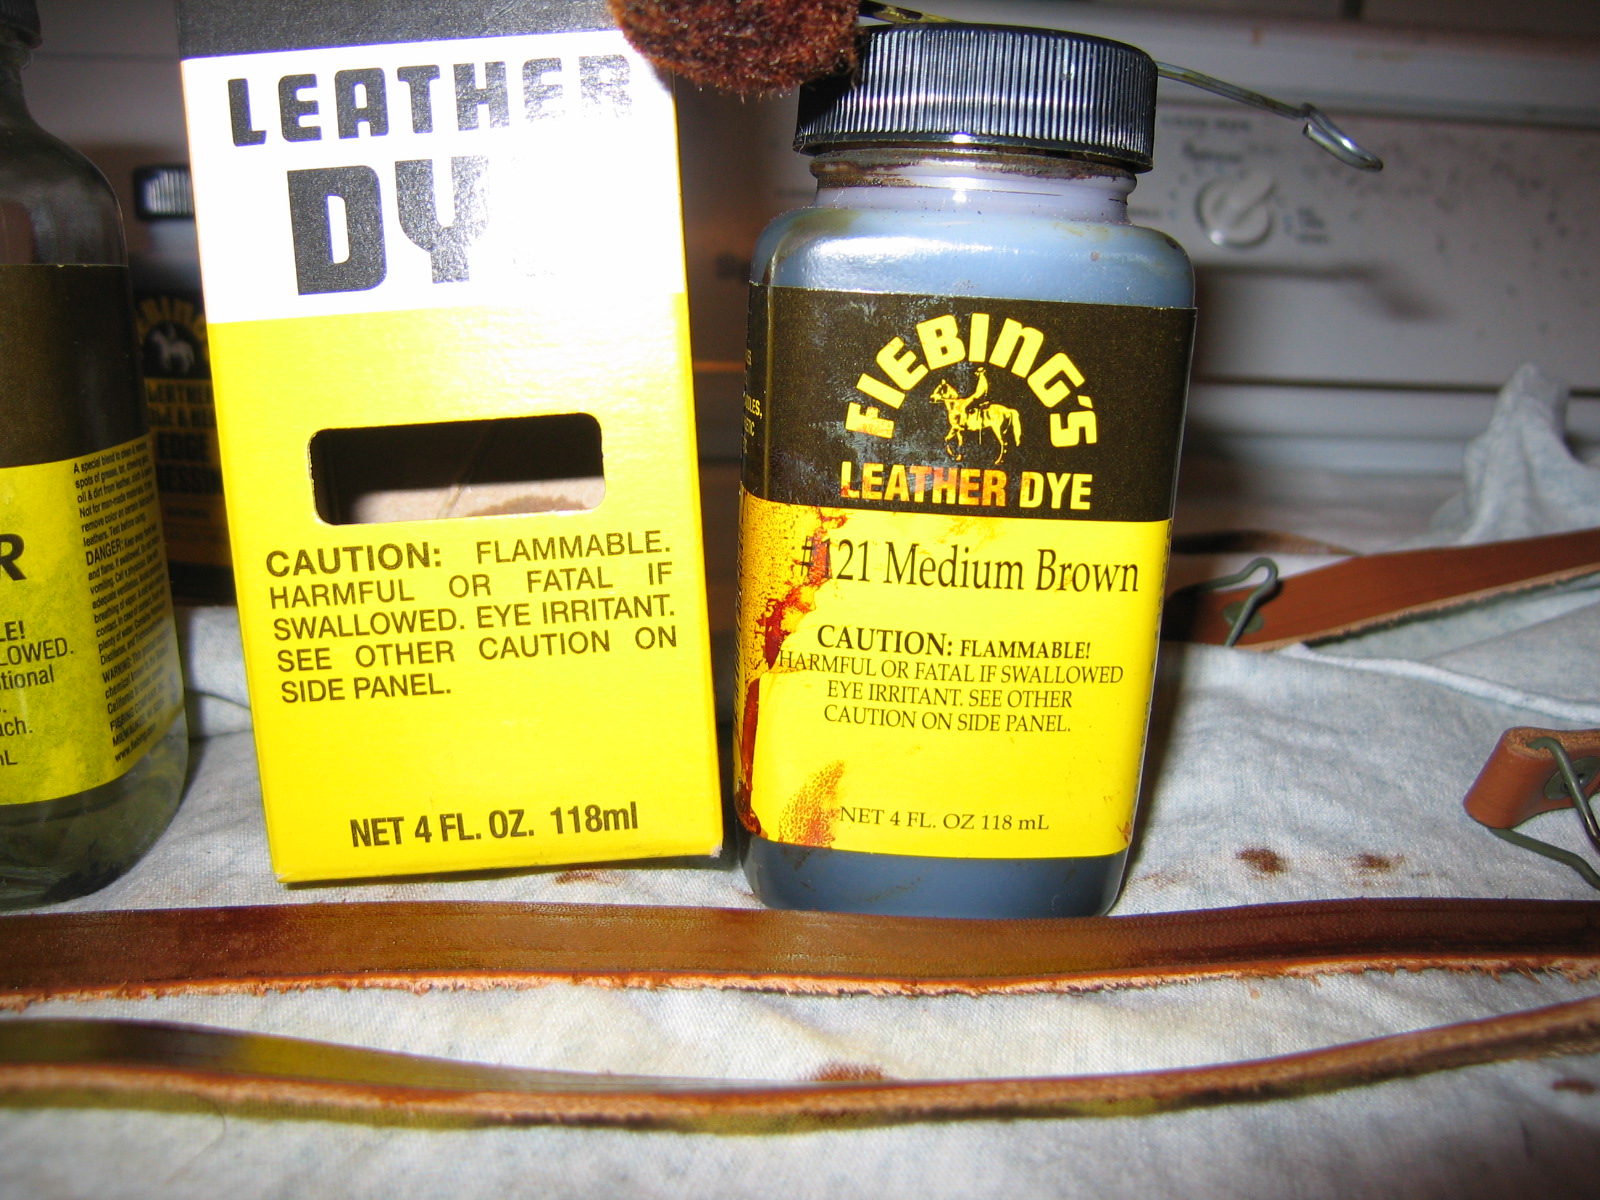
Fieblings “Spot Remover” (you can probably just use denatured alcohol – much cheaper)
Fieblings #121 Medium Brown Leather DyeProcedure:
I tried applying the leather dye directly to the chinstraps without any surface preparation – the results were poor, splotchy and a finish that didn’t seem to penetrate the leather.
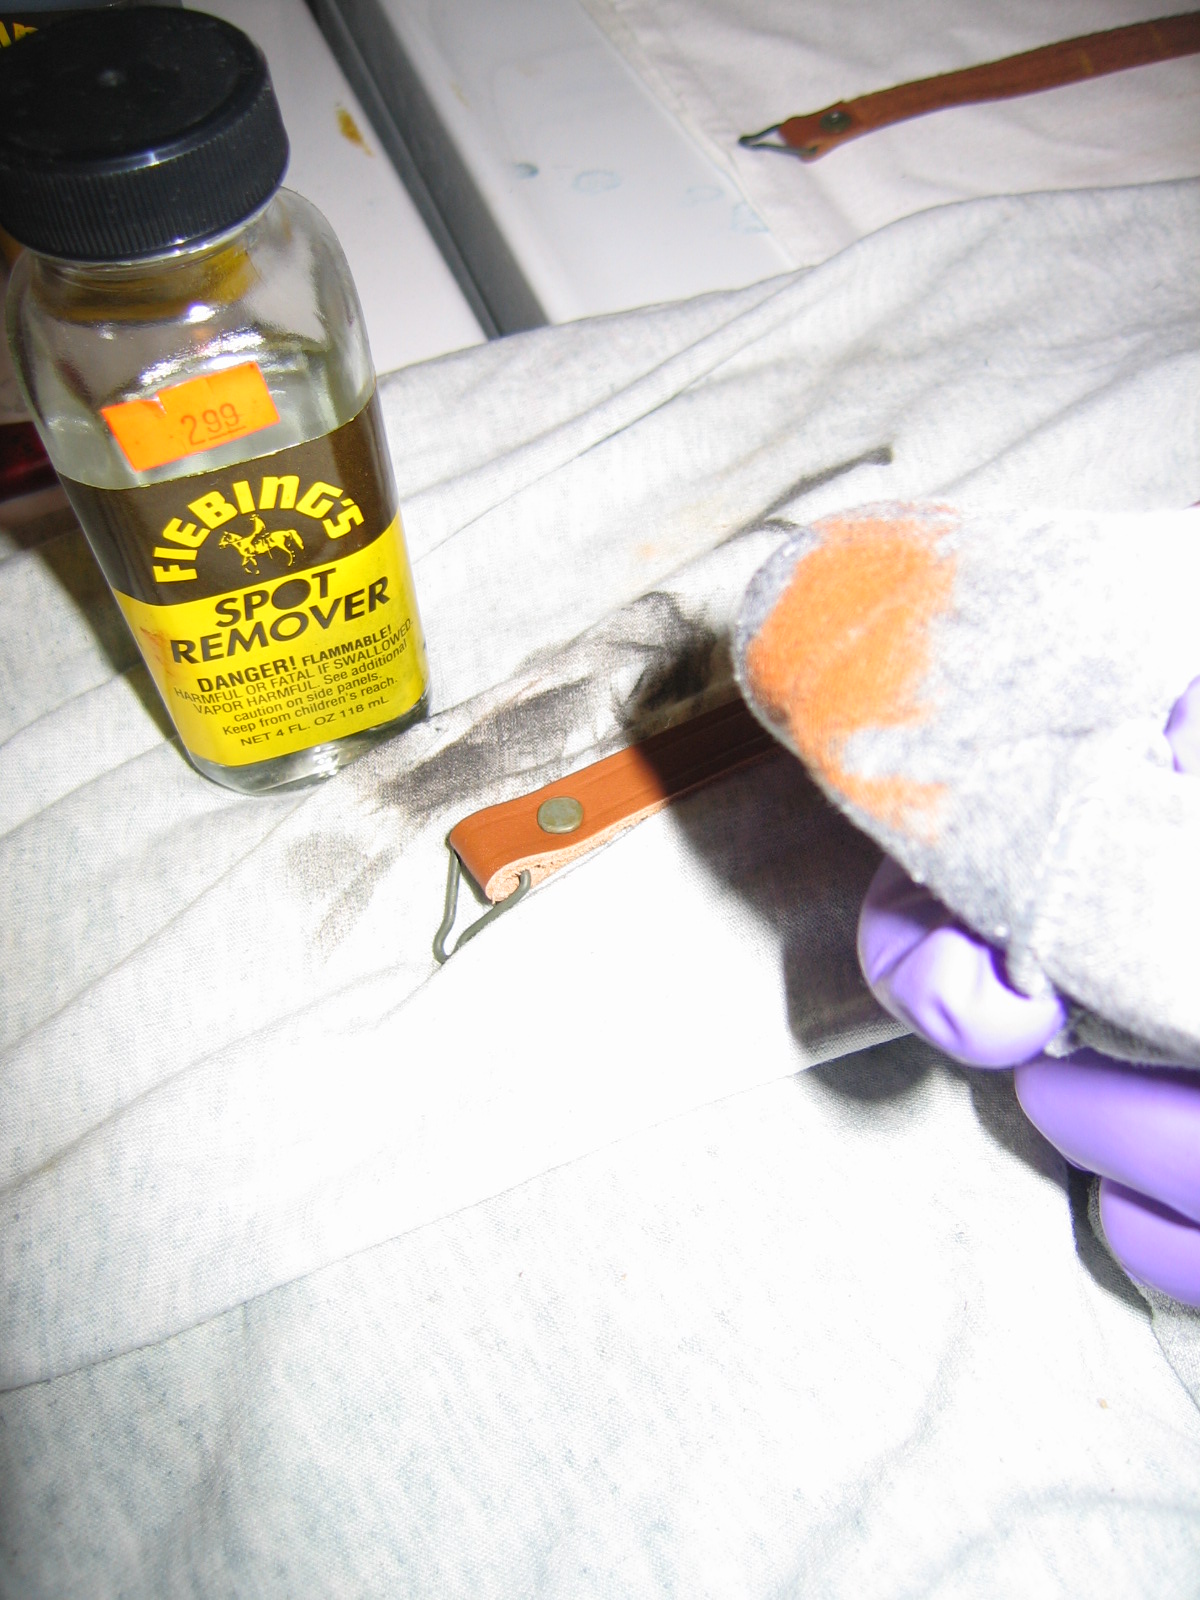
I used some Fieblings “Spot Remover” which was recommended on the dye box to be used for surface preparation to remove old finishes, wax and coatings. The “Spot Remover” smells like denatured alcohol, and dried about as quickly. I really bet that it is pretty much the same thing – and would have the same results at a much cheaper volume price. If you happen to have denatured alcohol sitting around – go ahead and use that.
A quick photo to show the “finish” that is coming off of the chinstrap in preparation for the leather dye
Once you’ve thoroughly cleaned the liner chinstrap of the existing finish, use the leather dye – as instructed on the package and give the chinstrap an even coat of dye. Don’t worry about getting it on the hardware, as it will wipe off, or clean up with a touch of “spot remover”.
If you want, you can coat the sides and back with the dye as well – I didn’t, since I was lazy when I was doing the photos for this article. I’ll probably go back and give the chinstraps a coat of neatsfoot oil just to further preserve and soften them. The neatsfoot oil will darken up the rough sides and back much more so than the “finished” front.
Here’s a side by side comparison of the dyed and undyed-untreated repro chinstraps, with the original, and the “neatsfoot oil” chinstrap above the untreated repro.
I’m pleased with the final result – as the color is comparable to that of the original – but with all the benefits of a brand new reproduction. I’ll still be able to maintain that dirty battle worn look that I’m after. Hopefully this will work out for you as it did for me.