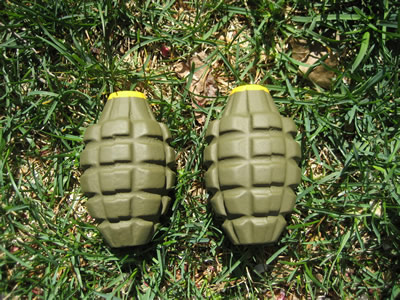
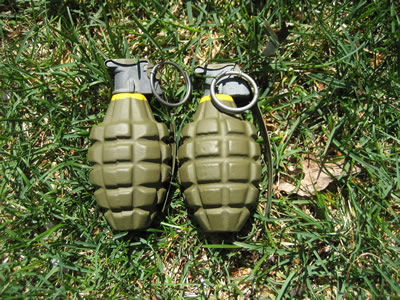
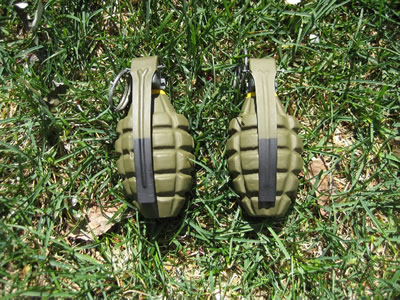
MKII Pineapple Grenade Restoration
Project Date: 6/20/2010
Author: Tom Kelly
Background
Recently I began looking for suitable grenades for my impression. I had been using two old Replica Ordnance replicas. The Replica Ordnance grenades were good, but they were resin and fragile. The resin would chip, and reveal the cream colored molding. More importantly they felt like resin. I wanted grenades with more heft and that actually felt like grenades should when I or the public handled them.
I consulted Greaser on what my options were. We both agreed that sifting through bins of RFX grenades for “WWII looking” bodies wasn’t worth it. While Drew’s article is useful for picking out more acceptable cheap RFX bodies, there are better options available. Greaser pointed out that WWII practice grenade bodies were easily available and relatively inexpensive ($40-50). Another more expensive option was original WWII bodies ($80). Original M10 fuses are offered from a number of sources and cost at most $20 (including spoon and ring).For additional reading and some photo comparisons of wartime and postwar RFX bodies - check out our article on "Authentic Display Grenades"
Selecting Materials
I was able to pick up my first training body at the annual Fort Indiantown Gap Battle of the Bulge reenactment. The dealer had it priced at $45 dollars, and it came with a 1956 stamped M204 fuse, spoon, and ring. I was able to get the grenade for $40, and immediately started looking for more bodies.
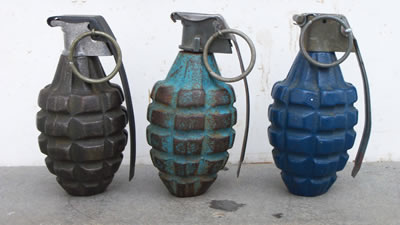
A few weeks after Fort Indiantown, I was able to get another training body with a wartime M10A3 fuse, spoon, and ring from a collector on G503.com . The grenade’s light blue paint scheme was worn, and it had a light coating of rust but since I was going to strip it down to the bare metal anyway I wasn’t concerned. I paid $70 shipped for the grenade, and justified it by estimating the cost of the body at $40-50 and the fuse at $20.
The final grenade I was able to purchase came off of the US Militaria Forum. Unlike my other two grenades, this one had a solid base. Interestingly, the grenade came with a reproduction fuse which is identical to the ones on my Replica Ordnance resin grenades. The seller had originally asked $150 for the grenade but was unable to sell it. I was able to pick it up for $80 shipped.
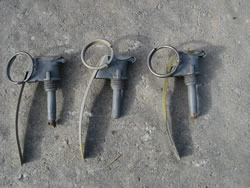
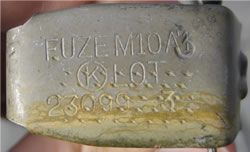
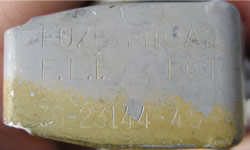
I needed at least two M10A2/3 fuse to restore one of the training bodies, because I did not want to use a reproduction assembly if I could avoid it. Hayes Otoupalik has WWII M10A2/3 fuse assemblies in stock for only $20, and so I bought three of them so I could one extra incase I found another restoration project. When the fuses arrived from Hayes I was surprised to see that I got an earlier M10A2 spoon, and two M10A1s which had been over stamped to A3s. I chose not to get the mythical "red washer" for these restorations - as the red fibre washer was not used with M10A2 or M10A3 fuses (Reference TM 9-1904 Ammunition Inspection Guide (March 2, 1944)).
Preparation
The first step of restoration was stripping the paint from the training grenades, luckily the solid base grenade had no traces of paint on it. I mailed the grenades to my buddy Kris Ruth who used a wire brush and metal files to remove almost all the paint from the grenades. When I got the grenades back from Kris only a few areas on each grenade still had some residual paint build up. This was especially true around the necks, and so I coated them with Paint Stripping Gel. After letting the gel sit, as directed, for 10 minutes I scrubbed the grenades with steel wool. After two applications I considered them ready for the repaint.Editors Note:
If you have access to a media blast cabinet - sandblasting / glass bead media typically works far better than any wire brush or chemical method combined. Glass beads seem to be about the best mix of aggressively removing old paint and corrosion without dimensional change or washing out details. Soda blasting / walnut media is a bit more gentle, but it takes a significant amount more time to complete.
Repainting
Now that the grenades were totally stripped, and ready to paint I gave some thought to priming them to save time and paint. I decided against priming though because when the paint chipped I did not want it to expose the primer.
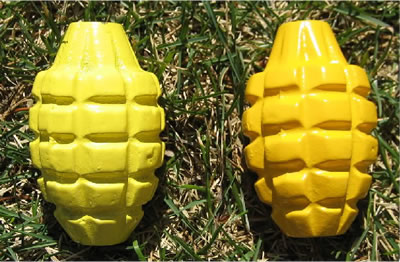
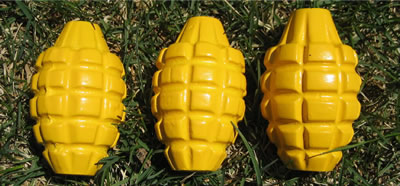
I decided to give each grenade a base coat of yellow paint, because if the paint chipped I wanted it to expose either bare metal or a yellow undercoat like mid-WWII grenades would have had. Also since I wanted to keep at least one grenade in the early yellow paint scheme it would give me a chance to experiment with colors.
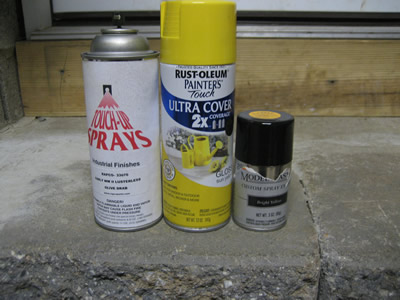
My first two experimental colors were Rust-Oleum Sun Yellow and Summer Squash. The Sun Yellow is advertised as a gloss, and not knowing how bright the color would be I decided to get a less bright shade with the Summer Squash. I also went to a local hobby store and bought a can of Testor’s Model Masters Bright Yellow (#2917) which is a semi-gloss.
When I sprayed a portion of each can onto a piece of white poster board to judge the colors it was apparent that the Summer Squash would not do. It was much too pale and completely unacceptable. The Bright Yellow was better, but still not as bright as I thought it would be and luckily not as glossy. I was most impressed with the Testor’s Bright Yellow. I decided that it would be the color I would use for my early grenade and for the bands around my OD painted grenades.
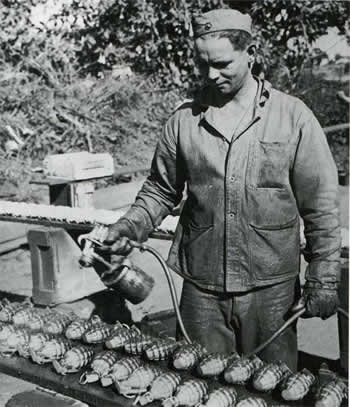
Because the grenades were not primed it took many coats to give them uniform coverage. The grenade which would remain in yellow paint took almost an entire 3 ounce can of the Testor’s paint. I decided that at $2.50/ can (as opposed to the $2.00/ can for a 12 ounce Rust-Oleum) I would have to make the Testor’s paint go further. For the other two grenades which would be over painted with OD anyway, I gave liberal coats of Rust-Oleum Sun Yellow and then a layer of Testor’s Bright Yellow.
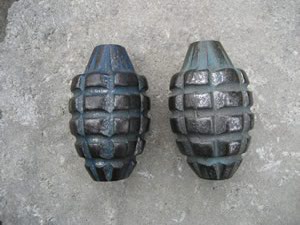
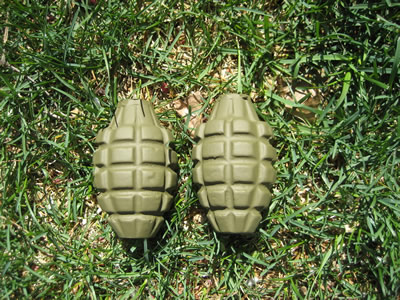
Now that the grenades were ready for an OD coat I went to the Rapco Paints website to see what paint I should use. TM 9-1904 Ammunition Inspection Guide (March 2, 1944) calls for fragmentation grenades to be painted with a flat lusterless OD. I decided on using color 33070 Early WWII Lusterless Olive Drab. When it arrived I tested it and found it to be a good color and tested it on my resin grenades that needed a touch up. For the practice grenades I sealed off a section of the neck with brown scotch tape to preserve a yellow band at the bodies top, just as mid/late WWII grenades were painted.When I removed the tape the yellow bands were intact, and I preceded on prepping and painting the spoons which were the final step.
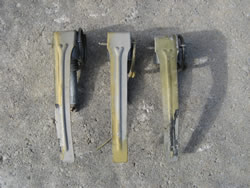
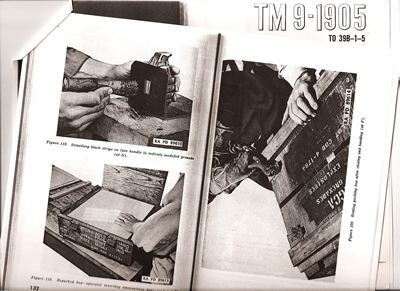
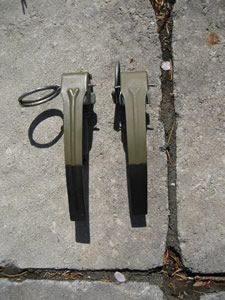
The fuses I had ordered from Hayes were perfect, but they all had a silver/gold patina on them of unknown providence. Of note is that the two modified spoons had remnants of the black paint used to mark them as being modified. I wanted to replicate this on the spoons when I restored them. Here's an excerpt from TM 9-1905 Ammunition Renovation showing how the modified spoons were marked and repacked. To the right is a photo of the "modified" spoon in action.I used the gelatin paint stripper to remove the paint and grime, which after a couple coatings revealed the bare metal. While this was ok for the M10A3 spoons, I had hoped to spare the original finish M10A2 which were left unpainted.
I gave the modified spoons each two coats of Rapco Early War Lusterless OD, the same color used on the grenades. I finished them by taping the upper two-thirds of the spoon and painting the bottom part with Rust-Oleum Flat Black. I wanted to restore the spoons to their original paint scheme and also represent a common wartime variation of the typical Mk. II Fragmentation Grenade.
Conclusion
I am glad I did this project, and I am pleased with the results. I think the converted practice grenades are much better than the resin grenades I had been using in almost every way. I like being able to hand an inquisitive spectator one of my practice grenades and let them feel the heft of what an actual grenade would have felt like (but is still not the actual weight), rather than giving them a flimsy resin one. The modified spoons gave me the opportunity to portray something not commonly done in reenacting, and learn about WWII ordnance in the process. The cost for the conversion was around $70-80 per grenade, steep compared to the $5 RFX grenades most reenactors use, but well worth every penny. Making suitable fragmentation grenades is another way to progress your impression. Considering the GI’s and reenactor’s affinity to carry grenades, quality replicas will always be useful.
90th IDPG Projects


