Installing a Philadelphia Ordnance Blank Barrel
on a Kahr Arms Semi Automatic ThompsonWritten: 12/2/2012
Author: Chris Guska
Foreword:
Philadelphia Ordnance offers an ATF approved blank firing only 10.5 inch barrel for both the M1(A1) and 1928 Thompsons. Installing this barrel does not necessitate a $200 tax stamp / registration of the firearm as a Short Barreled Rifle as would be required with a standard live fire barrel.
The M1(A1) barrel currently retails for $325 and 1928 pattern barrel for $375.
Being somewhat mechanically inclined, I figured this was a piece of cake project to swap a barrel...
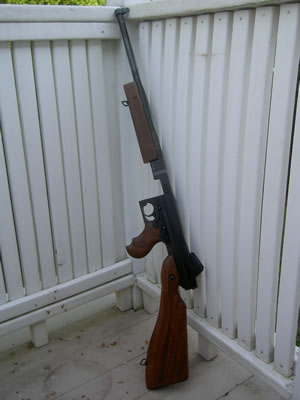
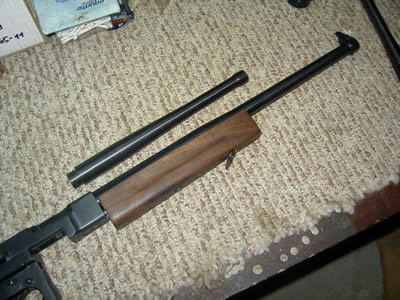
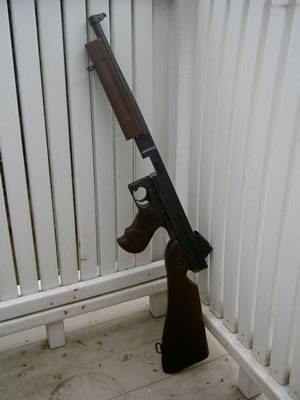
Here's Slash's Auto Ordnance TM1 Semi Automatic Carbine prior to the barrel swap.
The Barrel:
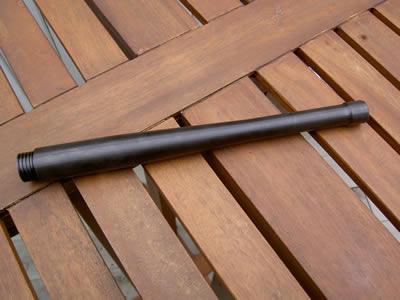
I'll be installing the "M1" style barrel. The contours are faithful to the original pattern. The muzzle is not externally threaded, as on the M1 and M1A1 the front sight ring was pressed on, then pinned in place.
The Thompson barrel has a non indexed square thread. It is simply spun on and then made tight. The front sight is pressed on, aligned then a hole drilled to be cross pinned in place.
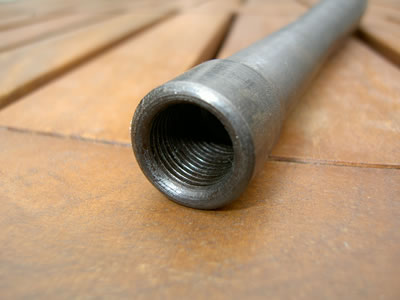
The muzzle of the barrel is threaded for 1/2 20 NF. I was surprised how deeply the thread was run - about an inch +. The muzzle only needed threaded deep enough such that the set screw restrictor being used would sit flush or slightly below the muzzle.
On both of the barrels I have installed to date, I was dissapointed with how poorly these were threaded in the first inch. There was a spot about 1/4 inch from the muzzle where the set screw didnt engage the threads and jumped. It makes removing screws a bit interesting.
Thankfully, once you get past the front sight ring, the threads improve greatly, and the set screw fits as it should. I wonder if these were threaded deeper to correct for a bad job on threading at the muzzle.
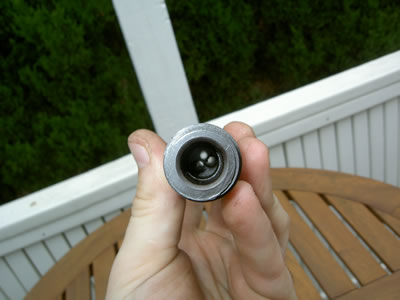
This is the feature that got this barrel approved. The barrel has 3 holes drilled down the length of the barrel rather than a single central bore.
The barrel is fully chambered and should headspace just fine once it is installed. The finish on the barrel was an attractive blue over machining rather than polished.
Installation:
First task was to get the old 16 inch barrel off.
I fully disassembled the upper.
- Upper off the lower
- Remove bolt and recoil assembly
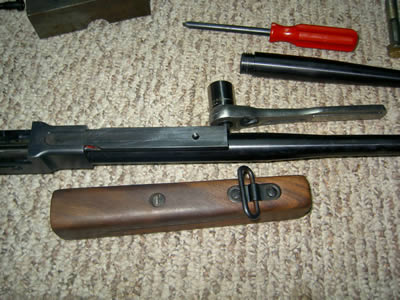
- Remove handguard from rail
- Remove front sight ring
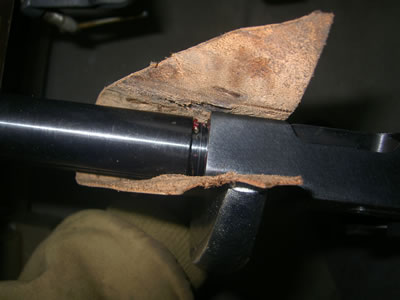
I purchased a "Thompson Barrel Wrench" off of a guy on eBay (wallycooper) as it looked like it would do the trick. The wrench is a heavy steel "strap" wrench - so that the barrel can be grasped and unscrewed without removing the foregrip mount.
I found the purchased wrench to be woefully inadequate, as even when tightened down as far as it could go, as well as using shims - the barrel refused to budge.
After doing some reading I discovered that Kahr Arms / Auto Ordnance uses red loctite on the barrel threads at the factory. I wont get into my opinions on that other than that it is horseshit.
I used a heat gun to warm up the receiver nose to free up the loctite. A heat gun is a gentle method to do this rather than taking a torch to it - a little slower, but far more controlled in my opinion. After doing a 2nd barrel swap, I've found this step to be unnecessary.
I once again found the purchased barrel wrench to not be up to the task - even with the barrel thread / receiver nose being heated up.
Fortunately, on the 16 inch barrels, the taper does not begin until after the end of the grip mount. This afforded me a cylindrical surface to possibly grip that wasn't blocked by the grip mount.
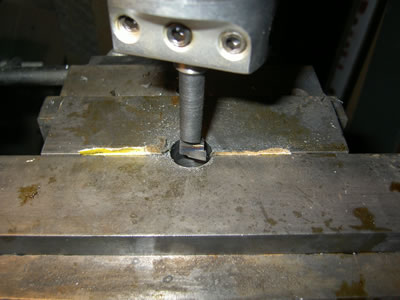
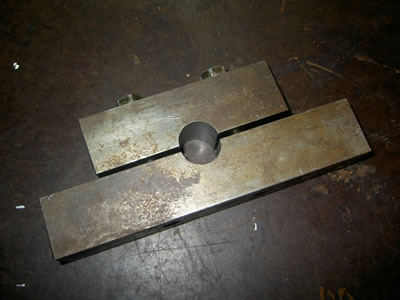
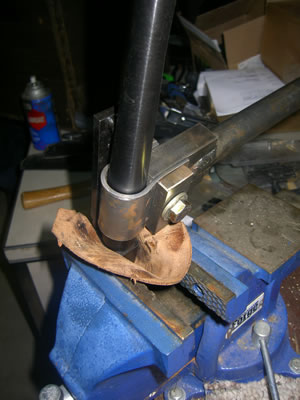
Off to the mill to make a set of barrel blocks. Knocked out a heavy set of blocks at a 1.00 inch bore with a boring head.
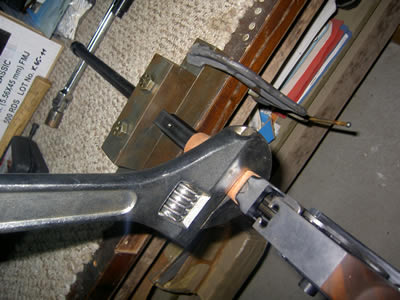
Clamped my new barrel vise to the work bench, put the barrel in it, tightened everything down and got out my Super Mario! action wrench.
I ended up doing a 2nd install recently, and found that my barrel blocks held the barrel just fine - and I didnt need to heat up the red loctite at all to get things loose.
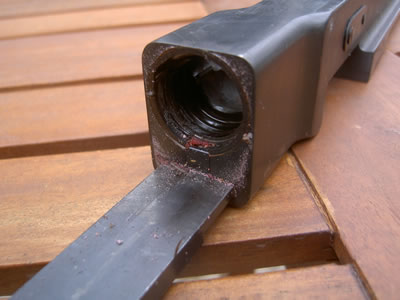
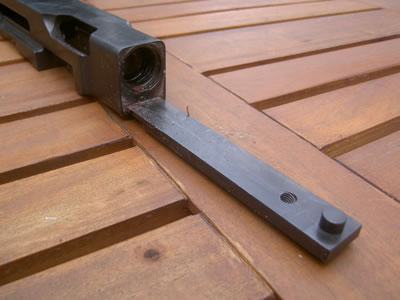
With the barrel now off, I was able to laugh about things and snap a few photos for your enjoyment. There was quite a bit more red loctite residue that was all over the barrel threads - which I didn't get a snapshot of.
From here, I cleaned up the threads on the receiver.
I screwed the new barrel in as far as I could by hand, this was about 1/4 inch from being fully seated.
Because the 10.5 inch barrel was profiled correctly, I was unable to use the barrel blocks that I made to finish the job. Instead, the barrel wrench I purchased did work for this application. Working about 30 degrees at a go, I screwed the barrel in as far as it would go. Since it is a square rather than V thread, as soon as it ran up against the receiver face - it got tight.
I pressed the original USGI front sight on, aligned it pretty close by eyeball to 12 o'clock - then drilled a hole for the cross pin. This is best done with a drill press or mill, but could be achieved with a cordless drill RedJacket style.
The Auto Ordnance front sight is a piss poor fit on the Philadelphia Ordnance Barrel. I highly recommend getting a USGI sight, which fits the Philly Ord barrel properly.
Test Fire:
The barrel came with 3 set screws. I started with the largest set screw provided - 0.172, which did cycle the weapon with .45 Subgun blanks from Atlantic Wall Blanks.
Running at 0.172 was a bit hot - and I feel that the right setting would be at around 0.209 for the Kahr Arms / Auto Ordnance semi auto Thompson. I would recommend having an assortment of screws in the following sizes for this setup - (.172, .187, .197, .209, .218). Hollywood type loads may need the larger sizes and possibly beyond.
Conclusion:
While it is expensive at $325 + shipping, I do feel that it is a well made product and well worth avoiding the hassle of a SBR. The huge plus with this is "no paperwork", although even when installed, the weapon is still a "firearm".
This is a real option for those of us who live in states or localities where SBR's are prohibited. With these being on the market, there are fewer and fewer excuses for seeing farby 16 inch barreled semi auto Thompsons.
90th IDPG Projects


