Re-Webbing M1 Helmet Liners
Author: Chris Guska
Date: July, 2009
Step 3: Making your own webbing liner kit (quick, stop here and just order one stupid!)
This really wouldnt be so bad if you had fixtures or tooling set up to do the measuring, cutting and positioning of holes for you. This is really a precision product, where a couple of millimeters or a 1/8th of an inch really makes a big difference in the finished product. If you're really not into precision work, this isnt for you.
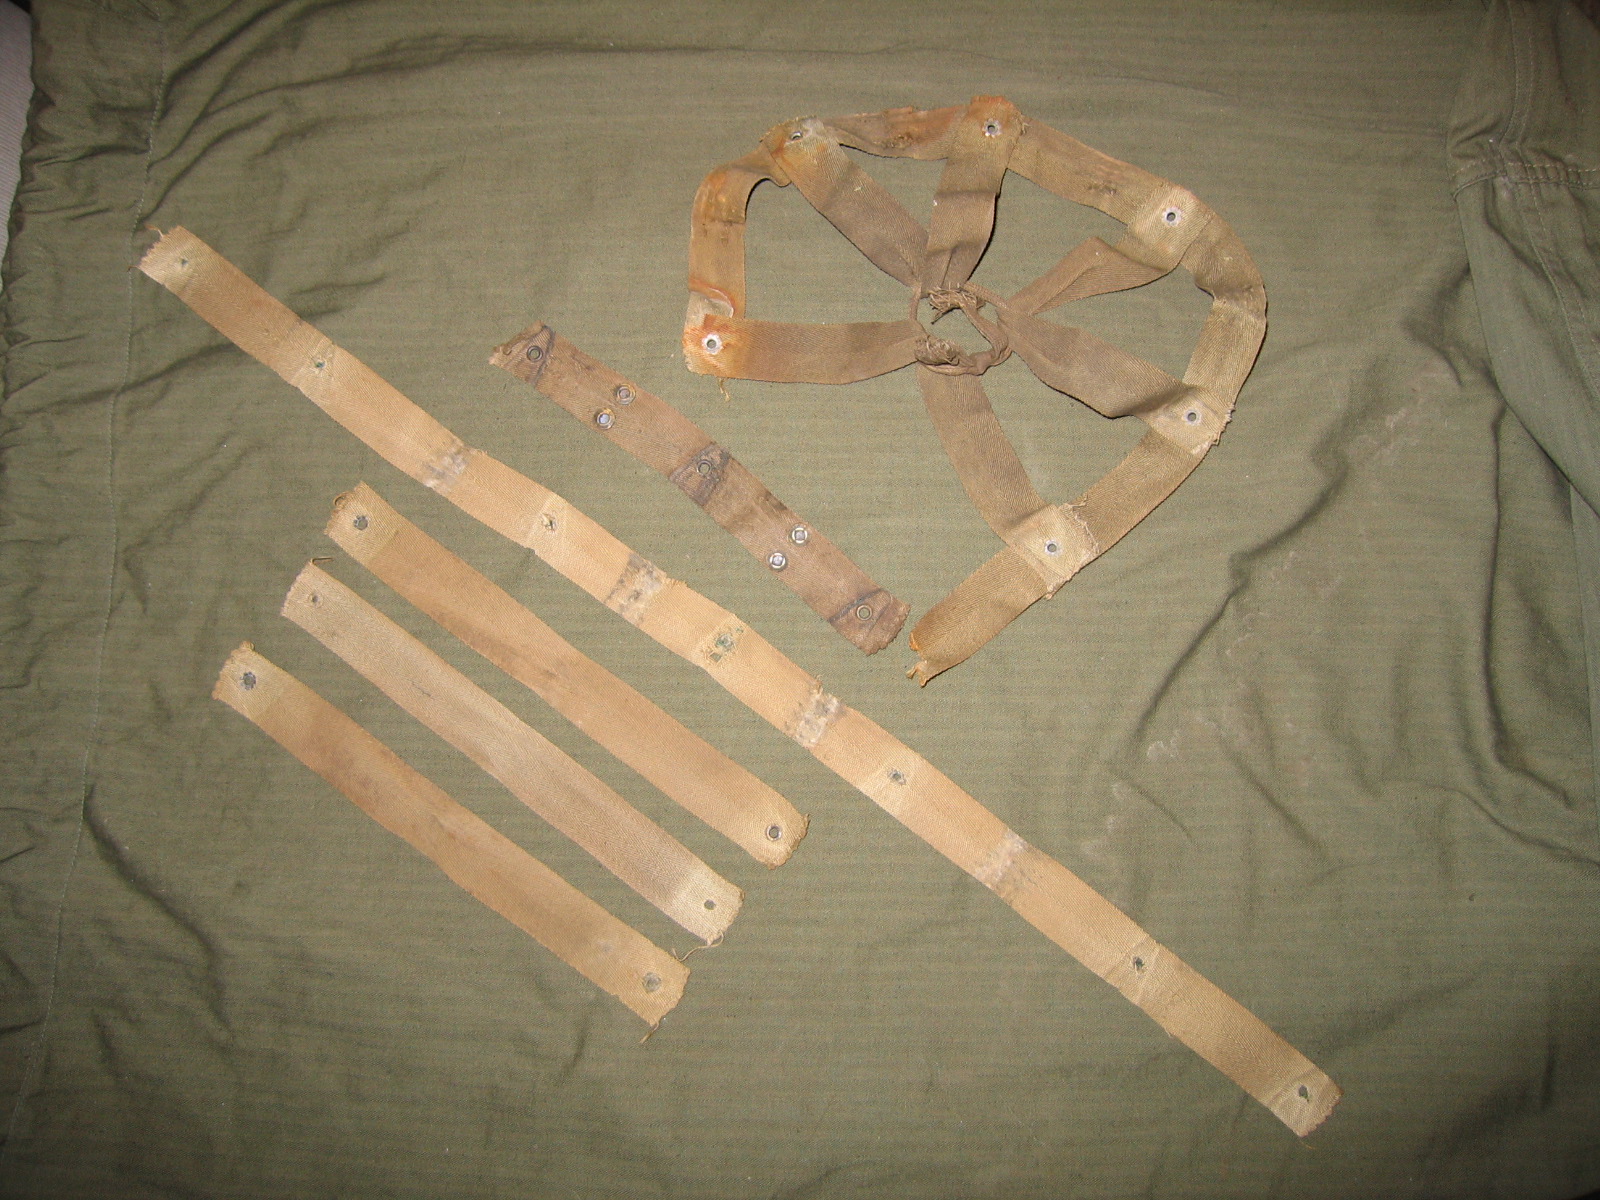
What I did when taking apart the helmet liners was to save all of the webbing and components so I could measure the individual components and make a pattern for me to use when cutting the webbing for the liners I had to re-web.
The liner has two main assemblies in it -
1.) The Basket
2.) The Nape Suspension
The Basket is comprised of a long piece of type 1 HBT webbing that is riveted to the helmet between 6 points on its circumference. Prior to installation, the band has 3 short pieces of webbing looped into V shapes and attached via eyelets to the band. The band, with attached V loops are placed over the rivets, one at a time, with an A washer on top of the webbing, then the semi-tubular rivet is roll crimped to hold that position in place.
The Nape Suspension is a short piece of type 1 HBT webbing that has 3 eyelets installed for strength when riveted to the helmet liner shell. There are 2 pairs of 2 female segma snaps installed on the webbing for the attachment of the Nape Strap.
The Helmet Liner Webbing kit consists of 4 pieces of type 1 HBT webbing.
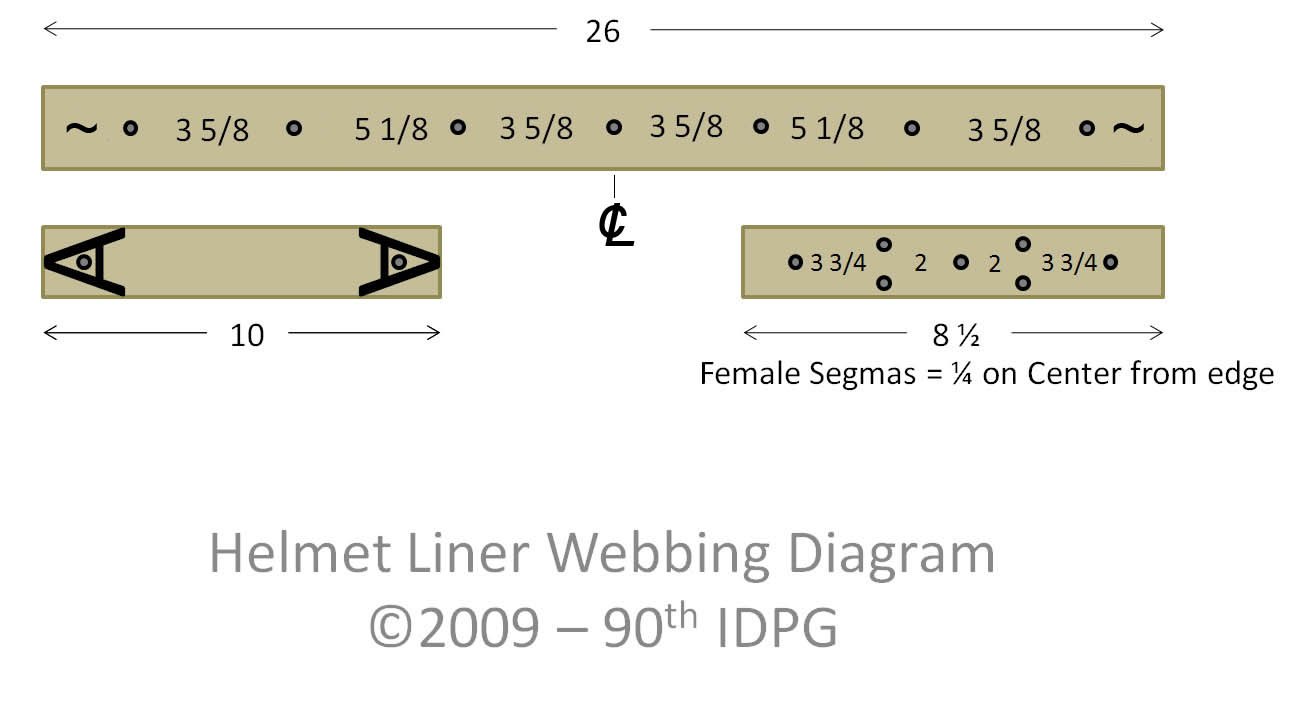
Main Band: 1 piece, 26 inches long
Suspension Loop: 3 pieces, 10 inches long
Nape Suspension Strip,: 1 piece, 8.5 inches long
When cutting the HBT webbing to length, use Pinking Shears.
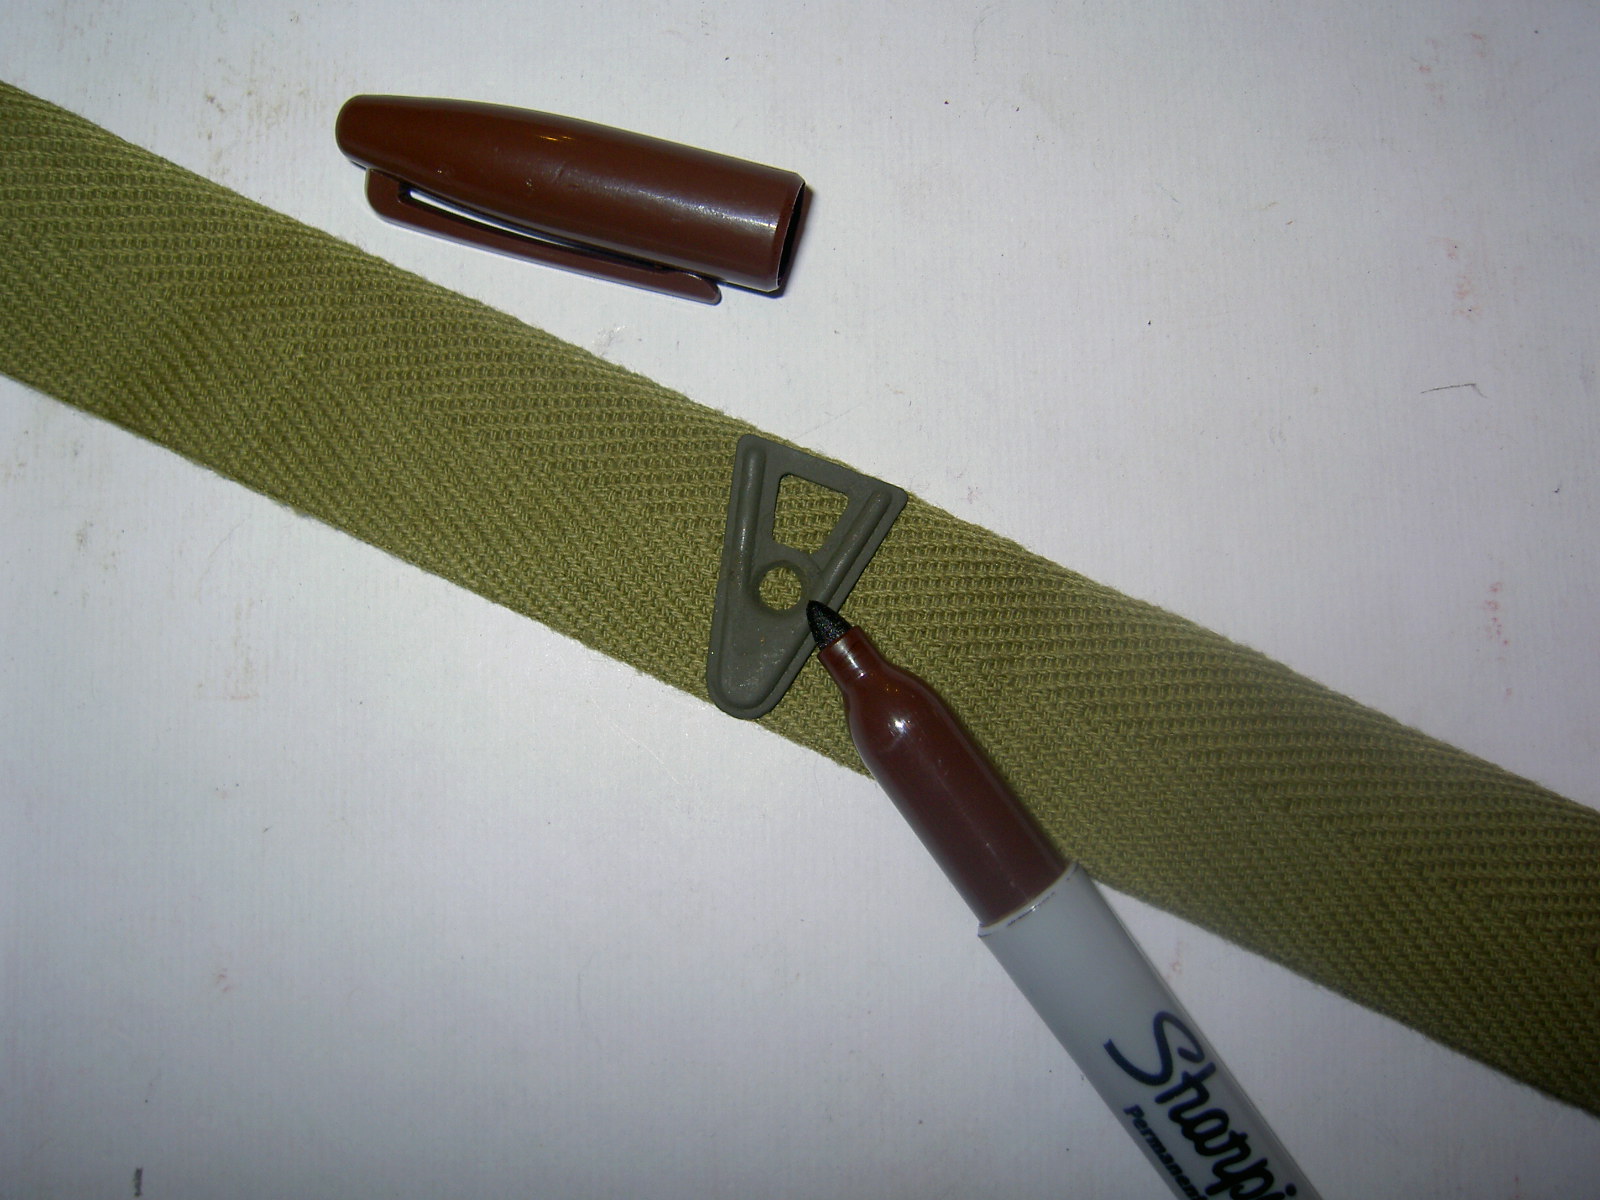
The really critical step of putting the webbing kit together is placement of the holes. When marking the placement for the holes, I highly reccomend using an A washer placed on top of the webbing, at the measured distance, then mark the placement for the hole to be cut through the center round hole of the A washer. When you lay the A washer on the webbing you'll notice that the hole in the A washer is slightly off center in relation to the centerline of the webbing. This placement makes a difference on the final installation, as the A washer will sit off the edge of the webbing in one direction or the other if the hole is not aligned properly.
Additionally, if the holes are not at their measured positions on the main band of the basket, the "tension" of the webbing will not be set properly, such that the webbing between some of the A washers and rivets will be very loose and floppy while others in another section of the liner will be too tight. The overall appearance will be very sloppy if not done with precision.
Once you have all the strips of webbing cut and the holes punched, its time to install the eyelets that hold the basket together. This is fairly straight forward, hold the two pieces of webbing together as desired, insert eyelet, use crimping pliers or setting die.
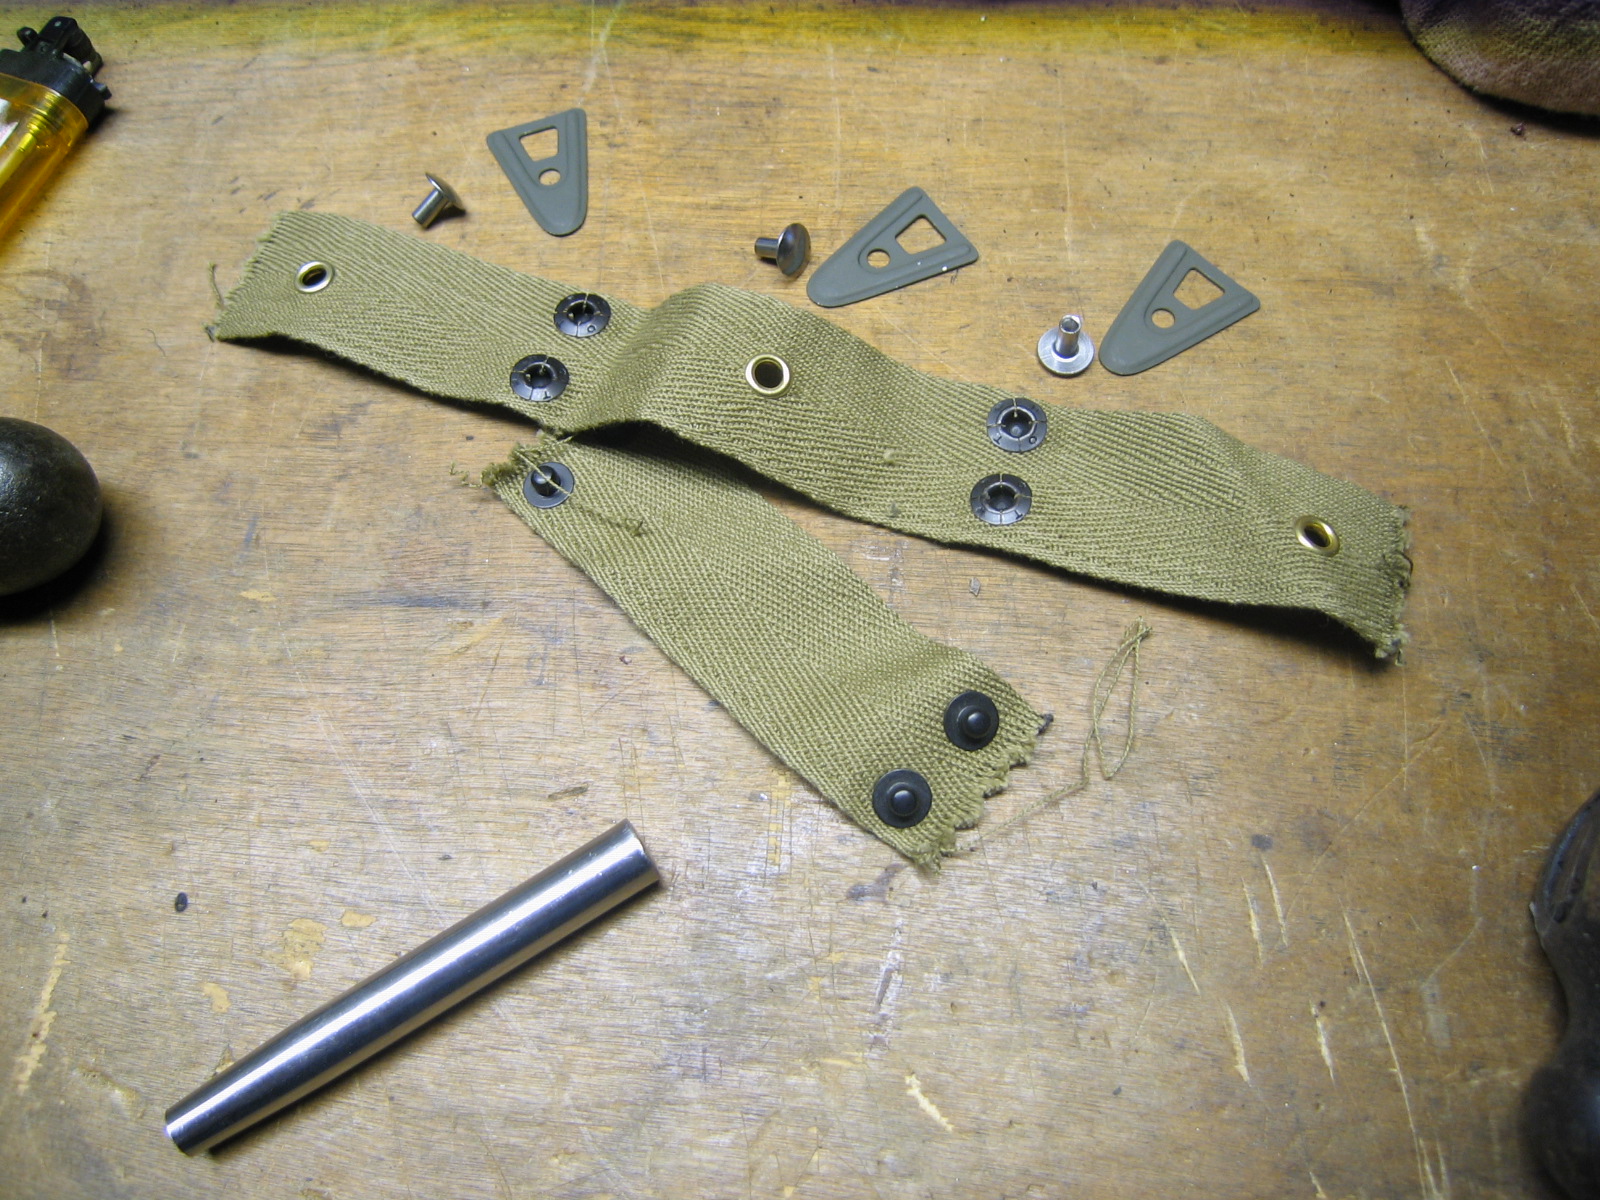
The Nape Suspension is a little more interesting, as you have to install female Segma Snaps on it.
The measurements for the position of the Segma Snaps are as follows:
XX from the center, right and left
X from the narrow edge of the tape for the center of the snap.
The Segma Snaps require a special setting die and bucking plate. A hole must be punched in the webbing for the stud of the snap, with a cup that is crimped around it to hold it in place. After placing the stud through the webbing and the cup on the backside, insert the setting die and lightly tap with a hammer to crimp the cup to the stud.
Be careful when setting the Segma Snaps, as you can set them too securely by hitting them too hard with the hammer - resulting in an extremely tight fit when trying to snap the nape strap in or remove it.
By this point you should have the "kit" that you could have bought from one of the fine retailers such as Top Pots, JMurray1944Inc or others.
So, you install the kit just as you would one that you had bought. If you didnt get the measurements just right - the result of which things being too loose and too tight, or segma snaps not being positioned perfectly and the nape strap puckering like a rasin when installed - after all that work you will probably look at it and say.... DAMN!! what a piece of crap. I wish I would have just bought the damn kit. Then proceed to want to rip it all out and do it over again - only to find out that the steel rivets that you got from one of the suppliers are much, much more difficult to drill out than the original brass rivets -requiring you to use a dremel tool to carefully grind away the crimps or rivet heads and pissing the wife off in the process...
Sound familiar? Yeah, been there done that - never again. Its not worth the cost of materials and my time to make these stupid kids, even with the discounted price I got on the webbing, and with free rivets and snaps.
Quicklinks:
X.) Introduction
0.) Tools & Equipment Needed / Sources
1.) Liner Preparation
2.) Paint Removal
3.) Making the liner kit (You are here)
4.) Hardware Prep
5.) Webbing Installation
6.) Paint & Finishing